Instructions to add these official Google-Buzz buttons (to Blogger Blogs):
STEP #1
Visit this page: Google-Buzz Stuff
Click on the link "Post To Buzz" and in the next page,
select the type of button you want to use on your blog.
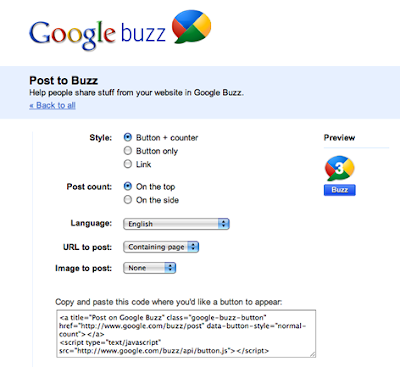
URL To Post - Containing Page
Image To Post - Let it be None.
STEP #2
Log in to Blogger, go to Layout -> Edit html and tick the tick-box "Expand Widget Tempaltes".
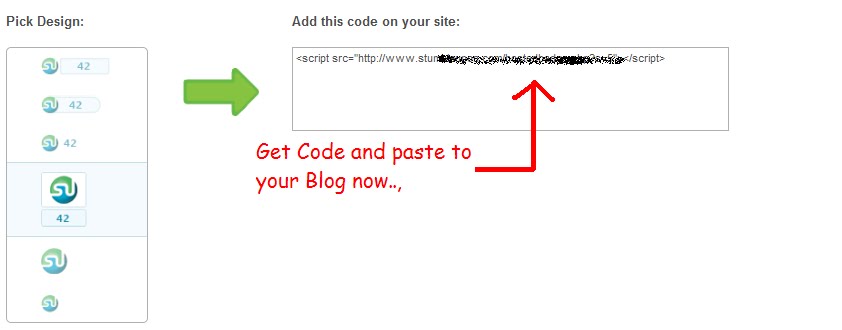
And find (CTRL+F) this code in the tempalte:
<data:post.body/>Immediately Before that paste this code below,
<!--BUZZ-STARTS-->
<div style='border:0px !important;text-align:right;margin-top:-42px;'>
Google Buzz Code Here</div>
<!--BUZZ-STOPS-http://youtrickz.blogspot.com-->
Make sure to change the Google Buzz Code with the code you got from the step 1
Then Save.